
Get tested used auto parts with fitment verification, warranty options, and fast nationwide delivery.
 Tested / Inspected Parts
 Fast Nationwide Shipping
 Warranty Available
Replacing an engine is one of the most important repairs you can perform on a vehicle. It is not only a financial investment but also a commitment to restoring your vehicle’s performance and reliability. Whether you have purchased a used, rebuilt, or remanufactured engine from GearShift Parts, proper installation is essential to ensure smooth operation, long service life, and full warranty protection.
This detailed installation guide outlines the recommended steps, best practices, and precautions to help you achieve a successful engine replacement.
Engine replacement is a complex mechanical procedure that requires technical knowledge, precision tools, and correct calibration. Modern engines are tightly integrated with electrical systems, fuel systems, cooling systems, and onboard computers.
For this reason, we strongly recommend that installation be performed by a certified mechanic or a licensed automotive workshop. Professional installers understand torque specifications, electronic integration, fluid priming procedures, and safety standards.
Improper installation can result in:
Choosing professional installation ensures your investment is protected from day one.
Before beginning the installation process, take time to carefully prepare. A proper pre-installation inspection prevents delays and costly mistakes.
Always confirm compatibility using your vehicle’s 17-digit VIN. Ensure the engine code matches your original unit. Even minor variations in engine code can affect sensors, mounting points, and ECU programming.
Before signing off on delivery, inspect the engine thoroughly. Look for:
Report any issues immediately.
Compare:
Place the original and replacement engines side by side if possible. This visual comparison helps identify differences before installation begins.
Even if the engine is in excellent condition, certain components should always be replaced:
These parts are inexpensive compared to the labor required to access them later.
A contaminated cooling system can damage your new engine. Completely flush:
Old debris or sludge may cause overheating if not removed.
Always install a new oil filter and fresh spark plugs. Starting a new engine with old plugs or a used filter can affect performance and break-in quality.
Worn motor mounts can cause vibration, misalignment, and stress on the new engine. Replace any mounts showing cracks or excessive wear.
In many cases, replacement engines are supplied as long blocks. This means certain external components must be transferred from your original engine.
Commonly transferred parts include:
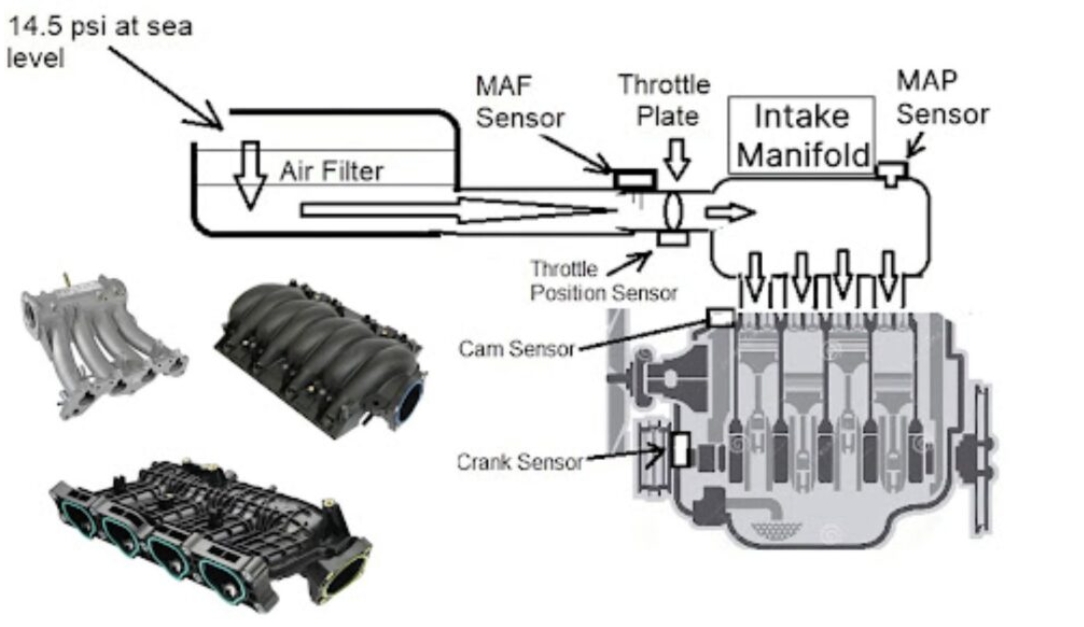
Do not assume that accessories such as alternators, starters, AC compressors, or power steering pumps are included unless specifically stated.
Carefully inspect transferred components before reinstalling. Replace any worn or damaged parts during this stage.
Below is a general overview of the installation process. Always follow manufacturer torque specifications and service manual procedures for your specific vehicle.
Disconnect the negative battery terminal first. Drain all fluids including:
Label all wiring connections and hoses to ensure proper reconnection later.
Carefully remove the old engine using an engine hoist and proper lifting equipment.
Before installing the new engine, clean the engine bay thoroughly. Remove:
A clean workspace helps prevent contamination and makes leak detection easier later.
Install new:
Never reuse old gaskets, even if they appear intact.
Carefully lower the engine into position using appropriate lifting equipment.
Align motor mounts precisely and tighten bolts according to manufacturer torque specifications. Over-tightening or under-tightening can cause structural stress.
Reconnect:
Double-check each connection to prevent misfires or leaks.
Refill with:
Use only recommended fluid grades.
Before the first startup, prime the oil system. This ensures lubrication reaches internal components before the engine fires.
Crank the engine without ignition (if possible) to build oil pressure. This reduces dry start damage.
Start the engine and allow it to idle. Carefully monitor:
Inspect underneath for oil or coolant leaks.
Let the engine run for approximately 10–15 minutes during initial observation.
The break-in period is critical for long-term durability. During the first 500–1000 miles:
This allows piston rings and internal components to seat properly.
After the break-in period:
Following this process ensures optimal compression and long engine life.
Maintaining warranty coverage requires adherence to installation guidelines. Failure to follow required procedures may result in denial of claims.
To protect your warranty:
Keep copies of:
Proper documentation verifies compliance with warranty terms.
Engine replacement is not just about swapping parts. It is about restoring reliability, safety, and performance. Careful preparation, professional installation, and correct break-in procedures ensure that your replacement engine performs as expected.
Take your time during installation. Double-check every connection. Use manufacturer-approved fluids and torque specifications. Never skip preventive maintenance steps to save time or money.
When installed correctly, your replacement engine will provide dependable service for years to come.
If you have any technical questions regarding compatibility, installation requirements, or warranty terms, contact the GearShift Parts support team before proceeding.
A properly installed engine is an investment in your vehicle’s future. Follow these guidelines carefully to ensure maximum performance, durability, and peace of mind.